
Are you looking for a creative and charming accessory to enhance your outfits? Look no further! In this article, we will walk you through the step-by-step process of making a stunning flower crown with ribbon. Whether you’re preparing for a wedding, festival, or any other special occasion, this DIY project will add a touch of elegance and natural beauty to your ensemble.
Before we delve into the detailed steps, let’s gather the materials you’ll need for this project:
- Assorted flowers: Choose a variety of fresh or artificial flowers in colors that complement your personal style and the occasion. Opt for flowers with sturdy stems, such as daisies, roses, or baby’s breath, as they are easier to work with.
- Floral wire: This will serve as the base for your flower crown. Ensure it is pliable yet sturdy enough to hold the weight of the flowers.
- Ribbon: Select a ribbon that matches or complements the color palette of your flowers. Satin, organza, or lace ribbons work well for creating an ethereal and feminine look.
- Floral tape: This adhesive tape is used to secure the flowers and stems in place, providing stability to your crown.
- Wire cutters: These will come in handy for trimming the stems and floral wire.
Now that you have all the necessary materials, let’s dive into the step-by-step process:
Step 1: Measure and cut the floral wire

Start by measuring the circumference of your head with the floral wire. Allow for a little extra length to ensure a comfortable fit. Once measured, cut the wire using wire cutters.
Step 2: Form the base
Take the cut wire and shape it into a circular or oval shape, depending on your preference. Make sure it fits comfortably on your head.
Step 3: Attach the ribbon
Using the floral tape, secure one end of the ribbon to the floral wire base. Start wrapping the ribbon around the wire, slightly overlapping each layer. Continue until you reach the other end of the wire. Secure the ribbon with floral tape once again.
Step 4: Prepare the flowers
Trim the stems of your selected flowers, leaving about 2-3 inches of length. Remove any excess leaves or thorns, as they can make the crown uncomfortable to wear.
Step 5: Attach the flowers
Take one flower stem and position it on the floral wire base. Use the floral tape to secure it in place, wrapping it tightly around the stem and wire. Repeat this step with the remaining flowers, spacing them evenly around the crown. Remember to alternate the direction of the flowers for a balanced and visually appealing result.
Step 6: Finishing touches
Once you have attached all the flowers, take a moment to adjust their positions and ensure they are securely fastened. Trim any excess stems or ribbon if necessary. You can also add additional embellishments like small beads, pearls, or decorative elements to personalize your flower crown further.
Voila! You have successfully created a stunning flower crown with ribbon. Try it on, and admire the beauty you have crafted with your own hands. This accessory is perfect for weddings, parties, festivals, or even as a whimsical addition to a photoshoot.
Remember to store your flower crown properly when not in use. Keep it in a cool, dry place to maintain its freshness and appearance.
Choosing the Right Flowers
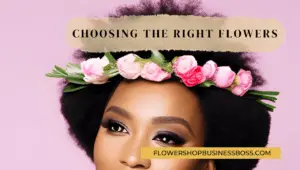
When it comes to creating a beautiful flower crown with ribbon, selecting the right flowers is essential. The choice of flowers will greatly impact the overall aesthetic and style of your crown. Begin by considering the occasion or event for which you’re making the crown. Is it a romantic wedding, a vibrant music festival, or a whimsical photoshoot? Understanding the mood and theme will help guide your flower selection.
To create a harmonious and visually pleasing flower crown, opt for an assortment of flowers that complement each other in terms of color, size, and texture. Consider the color palette you wish to work with, and choose flowers that align with your desired hues. For a soft and delicate look, pastel shades like blush pink, lavender, or baby blue can work wonders. If you prefer a bolder and vibrant crown, opt for vibrant colors like red, orange, or fuchsia.
In addition to color, take into account the size and shape of the flowers. Mix and match blooms of different sizes to create an interesting visual dynamic. For example, pairing larger blooms like roses or sunflowers with smaller delicate flowers like baby’s breath or daisies can add depth and dimension to your crown.
Another important consideration is the durability and sturdiness of the flowers. Since you’ll be working with them and attaching them to the crown, it’s important to choose flowers with sturdy stems that can withstand the process without wilting or breaking easily. Roses, daisies, carnations, and wax flowers are excellent choices as they have strong stems and last well.
Remember, you have the option to choose between fresh or artificial flowers, depending on your preference and availability. Fresh flowers lend a natural and fragrant touch to your crown, while artificial flowers provide durability and the ability to be worn multiple times. Consider the pros and cons of each option, and select what works best for your specific needs.
By carefully selecting the right flowers, you can create a flower crown that reflects your style, enhances your overall look, and adds a touch of enchantment to any occasion. Take your time to explore different flower varieties, experiment with combinations, and let your creativity blossom as you embark on this delightful DIY project.
Creating the Base and Attaching the Ribbon
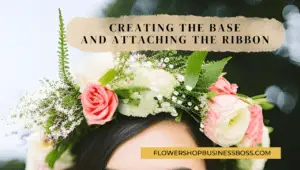
The base of your flower crown serves as the foundation for the entire design. It is formed using floral wire, which provides stability and structure. To begin, measure the circumference of your head using a measuring tape. Add a few extra inches to ensure a comfortable fit. Using wire cutters, carefully trim the floral wire to match your measurements. Remember to handle the wire with care as it can be sharp.
Once you have the correct length of wire, it’s time to shape it into a circular or oval form. Gently bend the wire to create the desired shape, ensuring that it rests comfortably on your head. You can easily adjust the shape as needed until you achieve the perfect fit. Keep in mind that a circular shape will give a classic look, while an oval shape can provide a more whimsical and bohemian vibe.
Now that you have the base ready, it’s time to attach the ribbon. Select a ribbon that complements your flower selection and desired style. Satin, organza, or lace ribbons work well for creating an ethereal and feminine look. Begin by securing one end of the ribbon to the floral wire base using floral tape. This will ensure a secure and neat attachment. Start wrapping the ribbon tightly around the wire, slightly overlapping each layer. Continue wrapping until you reach the other end of the wire. Once again, use floral tape to secure the ribbon, ensuring it stays in place.
The ribbon serves both a functional and aesthetic purpose. It adds a beautiful touch of color and texture to your flower crown, making it visually appealing. Additionally, the ribbon helps to cover the floral wire, creating a comfortable and soft base against your head. The overlapping layers of ribbon provide a cohesive look and prevent the wire from poking through. Take your time during this step to achieve a smooth and even ribbon-wrapping, as it will enhance the overall appearance of your flower crown.
Attaching and Arranging the Flowers

Once you have prepared your flowers by trimming their stems and removing excess leaves or thorns, it’s time to attach them to the flower crown base. This step requires attention to detail and careful placement to create a visually pleasing arrangement.
Begin by selecting one flower stem and positioning it on the floral wire base. Hold it in place with one hand while using your other hand to wrap floral tape tightly around the stem and the wire. Ensure that the tape is securely attached, as this will provide stability and prevent the flowers from coming loose. Repeat this process with each flower, spacing them evenly around the crown.
As you attach the flowers, consider alternating their direction to achieve a balanced and harmonious look. This will add visual interest and ensure that the crown looks appealing from all angles. Take a step back occasionally to assess the overall arrangement and make any necessary adjustments. If a flower appears too high or too low, gently reposition it and secure it with floral tape.
Once all the flowers are attached, take a moment to inspect the crown and ensure that each stem is firmly secured. Trim any excess stems that protrude from the bottom of the crown to create a clean and polished appearance. Additionally, check that the ribbon is still securely fastened to the base, adjusting and reinforcing it with floral tape if needed.
Remember, the beauty of a flower crown lies in its natural and organic feel. Embrace the imperfections and variations in the flower sizes and colors, as they contribute to the charm of the final piece. Take your time during this step, as attention to detail and a thoughtful arrangement will result in a stunning flower crown that you can proudly wear.
Conclusion
By following these detailed steps, you can create a stunning flower crown with ribbon that adds a touch of elegance and natural beauty to any outfit. This DIY project allows you to unleash your creativity and personalize your accessory for various occasions. Whether it’s a wedding, festival, or a special photoshoot, your handmade flower crown will turn heads and make you feel truly enchanting. Store it properly when not in use to maintain its freshness and appearance.
To learn more on how to start your own flower shop business check out my startup documents here.
Please note that the contents of this blog are for informational and entertainment purposes only and should not be construed as legal advice. Any action taken based on the information provided in this blog is solely at your own risk. Additionally, all images used in this blog are generated under the CC0 license of Creative Commons, which means they are free to use for any purpose without attribution.

Meet Shawn Chun: Entrepreneur and Flower Shop Business Fan.
I’m a happy individual who happens to be an entrepreneur. I have owned several types of businesses in my life from a coffee shop to an import and export business to an online review business plus a few more and now I create online floral business resources for those interested in starting new ventures. It’s demanding work but I love it. I do it for those passionate about their business and their goals. That’s why when I meet a floral business owner at a craft fair, farmers market, retail location, or anywhere else I see myself. I know how hard the struggle is to obtain and retain clients, and finding good employees all while trying to stay competitive. That’s why I created Flower Shop Business Boss: I want to help flower shop business owners like you build a thriving business that brings you endless joy and supports your ideal lifestyle.